Getting Started with Coveo Cloud for Sitecore
Lets get started with Coveo for Sitecore. We have two version to choose that would suit your requirements and budget.
-
On-Prem (Free with limitations)
-
Cloud (Recommended)
- Pro
- Enterprise
Coveo version comparison
Lets explore the cloud version. We will get started with the trial version of Coveo Cloud Enterprise that would last for a month, will help you explore.
Tip: Coveo trial version is by default Enterprise.
Dont worry if it expires you can always create more no limits to create trials and the best part is (no credit card information required). Coveo is generous enough to provide this option for people to explore. This is the recommended approach for developers to build solutions for Coveo. When it expires just run the configuration wizard and create another trial.
Tip: Plan to setup the trial during off hours to help save time. It would take an hour or more to setup and run re-index. I typically run this while I leave for the day.
Its good to understand the underlying Architecture how it works.
Architecture information how the systems interact
Download
Download the version that matches the Sitecore version and install the package.
Coveo provides trial version for a month which is always an Enterprise version
Download
Install
The installation is quite simple similar to installing a package. Detailed steps can be found in my post installation topic.
Configuration
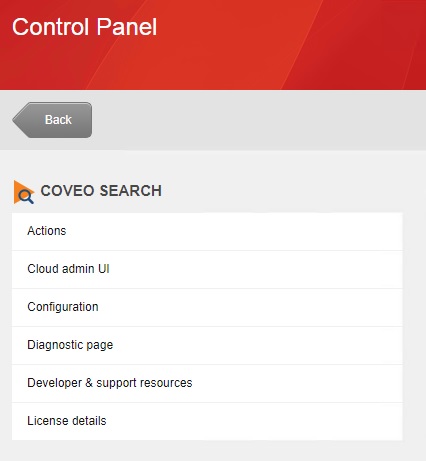
The Coveo can be configured from the UI or directly updating the configuration files. UI changes can be made from the Sitecore Control panel. Saving any changes will updated the underlying configuration files.Beware this will also cause application pool recycle. The configuration files for Coveo are typically located in the following location "Website\App_Config\Include\Coveo"
*Coveo.CloudPlatformClient.Custom.config*
    Stores the api key, cloud url and the organization id

*Coveo.SearchProvider.Custom.config*
    Stores all the field information and customizations

*SwitchMasterToWeb.Coveo.config*
    Disabled by default and should be enabled in multi server environment on
content delivery.

Configuration can be validated by opening the Diagnostic page in the Control panel
Cloud Administration
The UI used to view the cloud Coveo data and environment configuration. Its typically used to verify and validate the settings that are made in the local.
Cloud Administration link
we should avoid making any configuration changes in cloud. When a synchronization happens from local to cloud will revert any changes made directly on the cloud. I learned it the hard way.
E.g: I made a field sortable in the cloud and every time there is a re-index it would reset back. This happened due to the process of sync local to cloud as the first step of indexing.

Provisioning
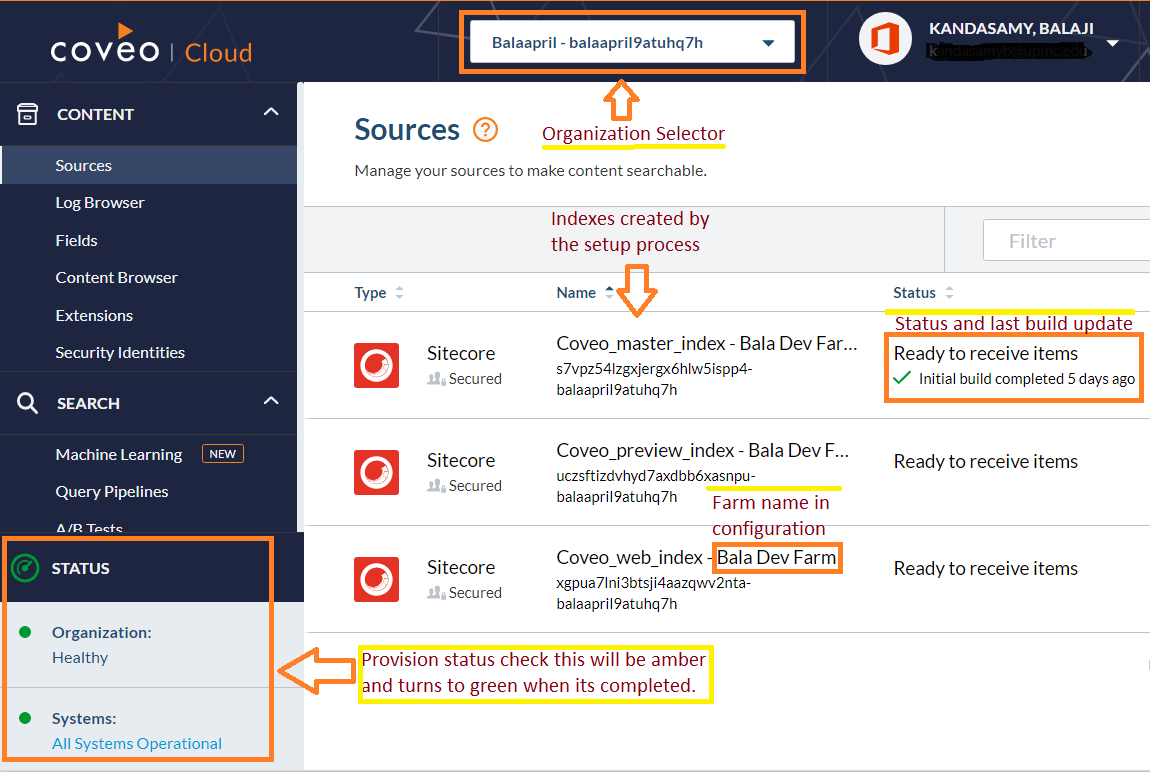
After the package install and configuration the cloud instance takes between 15-30 minutes to get provisioned. The provision status can be tested in the cloud platform page in the bottom left corner.
Understanding Provisioning
Indexing
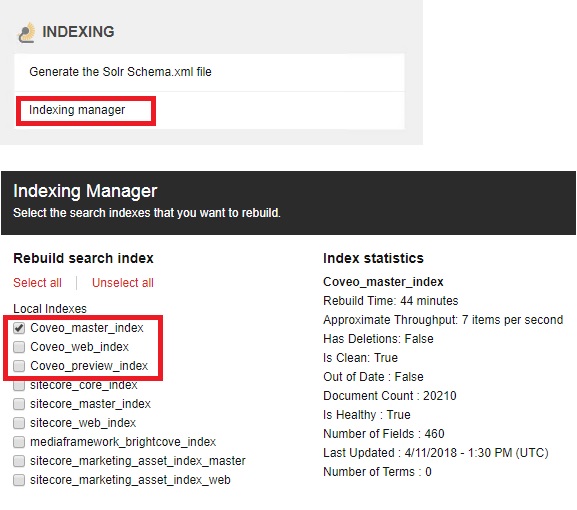
The indexing is the key process of crawling the sitecore items and documents and upload them to Coveo. The indexing can be started after the provisioning is completed by the following
Sitecore Control Panel > Indexing > Indexing Manager
Choose the appropriate Coveo Index to get started once the indexing is completed create a test page to Explore the Coveo search.
Indexing Guide

Demo Page
Follow the article to create a simple Coveo Search page and check the results.
Insert Search Interface
We have successfully installed and configured Coveo Cloud for Sitecore.
Cover Photo by Annie Spratt on Unsplash
Subscribe to Bala Blog | Sitecore MVP | Coveo MVP | DX MVP | Sitecore | Coveo | Microsoft
Get the latest posts delivered right to your inbox

